
How to Utilize a Calendar
Calendars are a useful way for managing appointments in your system. Before creating a calendar, you’ll want to ensure you have an understanding on unassigned vs. team calendars.
Please refer to our tutorial “How to Create and Utilize Teams Within Your Calendar” to learn more about teams and team calendar setup.
Part 1: Creating and Managing Calendars
Step 1: Navigate to Calendars
Select + New Calendar under the desired calendar team
Step 2: Calendar Team & Event Setup
Choose your Appointment Distribution (for team calendars - automatically skipped for individual calendars)- How you want appointment for services to be distributed for the team
Optimize for availability – Select user, priority level and location for each team member. Availability is based on priority level
Optimize for Equal Distribution – Select user and enter location for each team member. Sets appointments by sequence, starts at the top of the list of users and works its way down
Calendar – Description on Calendar
Calendar name – Name for your calendar
Description – Written representation for event
Calendar URL - Path Name for your calendar link
Appointment title – Name for appointment (add title after {{}})
Event color – Color the event will appear in
Save & Continue.
Step 3: Managing Availability
Customize Appointment Slot Settings
Slot Duration – Duration of each appointment (30 minutes, 1 hour, etc.)
Slot Interval – Frequency of appointment availability
Buffer Duration Between Appointment - determines how frequently appointments can be booked in relation to each other (i.e. with a 15 minute buffer, if you have 30 minute appointments, once an appointment is booked for 10:00am-10:30am the calendar will put in a 15 minute buffer so the next appointment could be booked at 10:45am.)
Appointments Per Slot - Maximum number of appointments permitted per slot for the user (If the number of appointments exceed for the given slot for the user, then it either switches over to the next user in the round-robin queue or marks the slot unavailable for the prospect to book)
Appointments Per Day - Maximum number of appointments permitted per day on this calendar
Choose Scheduling Notice
Minimum Scheduling Notice – Days to be notified before appointment
Date Range – Days events can be scheduled in the next entered days
Set Office Hours
Select days – Blue = Days selected, Grey = Unselected Days
Select + Hours to add additional hours to specific days
Select Apply All to copy hours for the rest of the days selected
Save & Continue
NOTE: If the Company time zone is different from your user timezone, you will need to set the calendar availability to reflect the user timezone instead of the company timezone. For example, if a user is available 8am-5pm PST and the company is EST, you will need to set the calendar availability to be 11pm-8pm EST for it to show properly.
Step 4: Confirmation Settings
Form Settings
Custom Form - you can set a custom form for the booking widget instead of the default form which having first name, last name, email, and phone fields
Use Sticky Contact - Follows the contacts journey and keeps information they have entered
Use Stripe Payment – Must have Stripe integrated on your account. Choose Amount, Currency type, and message for charge description
Notification & Additional Options
Let calendar auto confirm my appointment - Auto confirm an open sport on your calendar
Send appointment alert emails to the assigned team member - Please note that if this is selected sometimes the emails may look like the appointment was not auto confirmed
Allow google calendar to send invitation or update emails to attendees – Allow google to notify attendees of appointment
Allow rescheduling – Option for client to reschedule
Allow cancellation – Option for client to cancel
Additional notes – Contains link to reschedule or Cancel
Pixel ID - It will come through as part of your schedule
Form Submissions
Form submit Redirect URL - In case you have a confirmation page and want visitors to go on the next level of the funnel
Customize Thank You Message - Type in the box here if you want something different then the default message
Click Complete to confirm your changes and save your settings.
Step 5: View Your Calendar
Calendars that have been saved to the account will appear in the Calendar settings
Click on … to make changes:
Edit – Make Changes to Calendar
Disable Service – Disables calendar until it is enabled again
Delete – Delete calendar from the account
Part 2: Using the Calendar
Step 1: Access Your Calendars
From your Dashboard menu, you can directly access your calendar(s) for a visual of your appointments and blocked off time.
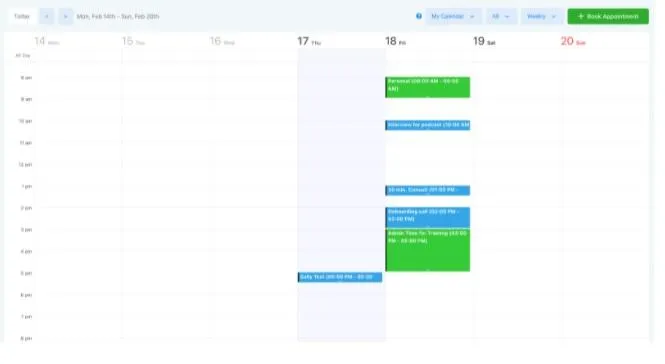
Step 2: Filter The Display
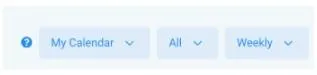
If you have more than one calendar, you can switch between them using the dropdown menu for “My Calendar”
Under “All” you can filter your calendar to show appointments, blocked time, or both.
Under “Weekly” you can adjust the display between a monthly, weekly, or daily calendar view.
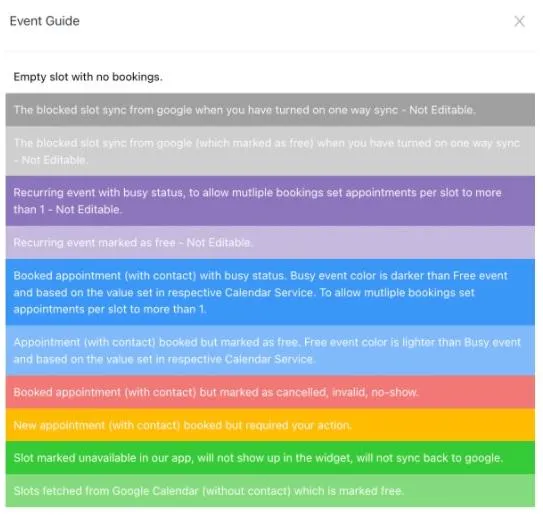
By clicking on the ? icon, you can view the Event Guide, or legend, to understand the various color codes for different types of appointments/events in your calendars.
Step 3: Adding Appointments to Your Calendars
Click into the date/time you wish to schedule the appointment for. Or, click the “Book Appointment” button at the top of the page.
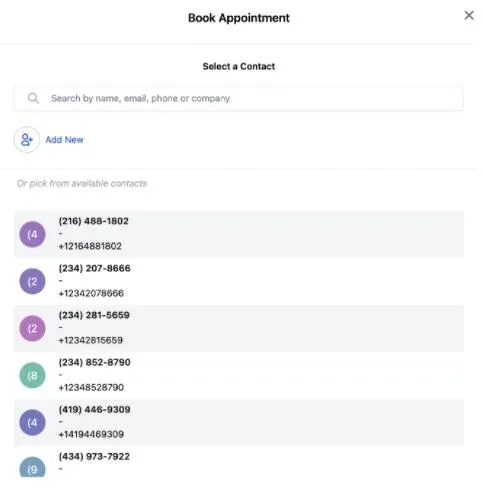
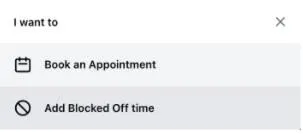
In the popup window, you’ll see two options. Choose “Book an Appointment”.
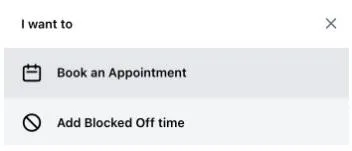
Select the Contact you wish to create the appointment for.
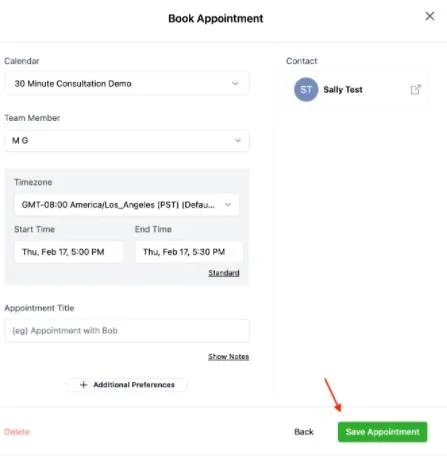
Fill out the appointment details and click “Save Appointment” to add the appointment to your calendar.
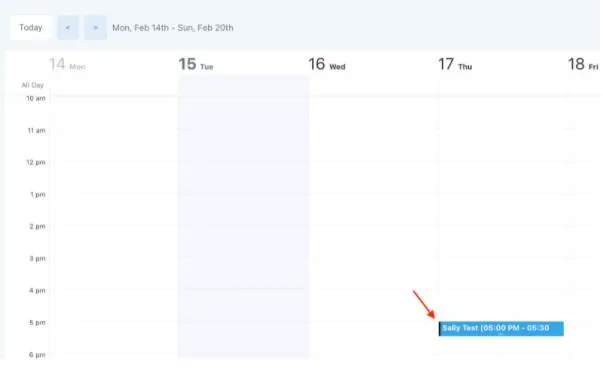
Your appointment will now appear in your calendar at the date/time you chose.
You may click into the appointment to edit or delete it anytime.
Step 4: Adding Blocked Time to Your Calendars
Click into the date/time you wish to start blocking off time. This could be for vacation/PTO, an offsite meeting, or any other reason you want to hold time in your calendar.
In the popup window, choose “Add Blocked Off time”.
Fill out the details including timezone, days/times you wish to block off, and a title and description.
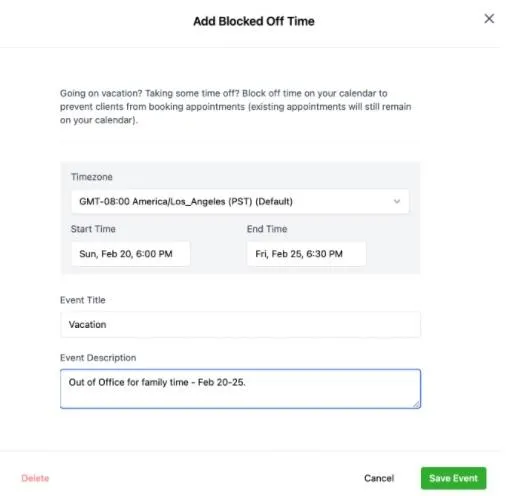
Click “Save Event” to confirm and add this time to your calendar.
Now you should have a general understanding of how to manage and utilize the Calendar section of your system. There are several customizations and features you can set up to make sure this works best for your specific use case. You can navigate back to your Calendar Settings directly from the calendars page, using this icon:

Or you can navigate to Settings > Calendars to make any changes. You can always make adjustments along the way if you need to. Either way, you can customize and enhance your calendar settings as you need to so this part of the system works best for you and your business!
Conversations
Reporting
If you have any suggestions for an automation or questions you can send an email to [email protected]